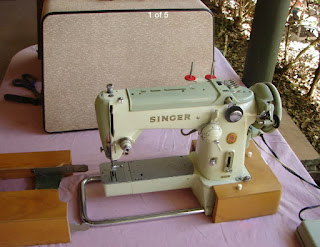
A lot has been achieved cleaning-wise over the last week. I'm liking this machine more. I removed the motor and light, and have been concentrating on cleaning the head.
THE MOTOR
The motor made me nervous. I'd never seen inside a sewing machine motor before. I could find a lot of tutorials about repairing or rewiring US potted motors, and UK models, but Australian external motors are less documented. The only source I found was at Tailor or Failure, who has some good information
here about disassembling the light and checking the motor. There are another two posts from Mike, one
here about the female machine plug and the foot controller, and another
here about cleaning and checking the main moving parts.
Anyway, I looked at my wiring and compared it to what Mike showed. None of my wires were touching, or looked damaged. They just looked old.
 |
| Inside the wiring cover area, hopefully not a potential deathtrap. |
The female machine plug was a different story. While the wiring inside looks ok, the point where the wires enter the bakelite have sprung out. That's the green earth/ground wire you can see poking out, as the machine has no earth it originally just sat inside the plug, connected to nothing. I'm going to get some heath shrink tubing and see if I can tidy this up.
The lack of earth scares me. I'm essentially the earth when using the machine, and I don't think our RCD/ELD will do much to save me. I'm going to see an electrician about my concerns.
I found a very nice solution explained
here on Igor's blog, the machine plug coming from only one side is much better, as is the earth connection.
 |
| Not great. |
Next came the motor itself. It was pretty clean inside. I wiped down the armature, and cleaned the commutator with a vinyl eraser. I didn't take a photo of that. I checked the carbon brushes and they were good, lots of length left.
 |
| Good long carbon brushes, not stubs. |
I was glad the motor and light went back on correctly. A new rubber belt was ordered and fitted.
 |
| Clean! |
I didn't dismantle the light, as it worked and the knob turned it on and off. The light cleaned up ok, and has now been securely fixed, it now sits out from the machine so no more moving and scratching of paint.
 |
| Cleaner light and paintwork, but still rust spotted. |
THE HEAD
My delicious and citrusy orange D-Solv It got rid of the oil and grime, but didn't touch the scuffs and marks. I ended up lightly polishing all the paintwork with 'Purple' metal polish from California Custom and had very good results. I faded my decals a bit doing it this way. But, I wanted clean, and it's now clean and the paintwork is shiny and smooth in most parts.
 |
| Some rust under the enamel of the rear plate, but treated and cleaned. |
The rough face plate is now much nicer. I applied a solution of shellac and boiled linseed oil on a cloth, and used firm strokes to smooth the finish as the shellac slightly melted new finish into the old.
 |
| Shiny! |
I tried to swap the bobbin plate, but as you can see (above), the shine doesn't match the throat plate. The super-shiny bobbin plate is from my 201K, and while shinier, it does have pin rash. I've put each one back on the original machine.
THE FOOT CONTROLLER
The button foot controller was next. The bakelite housing shined up well. The inside was gross, rust, lint, and much other yucky stuff. I cleaned the pedal carefully, tried a bit of rust conversion, oiled the metal on metal parts, and left a fine film of oil on the screws.
 |
| Rusty. |
I also oiled the button on the bakelite pedal, it squeaks less and moves a bit better, but those button pedals don't seem to be the most precise thing...
After having so many wins with the machine, I went outside to look at the table. I have been using a great paint stripper called Citrus Strip, and it works very well. But, the table still smells.
 |
| Lovely wood beneath crappy paint. |
I'm not sure what to do. I'll finish stripping the paint, but I think this will become an outdoor laundry table. I can't imagine sitting in front of it to sew.
More in Part 3.


Comments
Post a Comment